How to add a custom font
Adding a custom/unique font to our website is an easy trick to elevate your website design by personalizing fonts that Squarespace may not have. It’ll only take a few minutes all the steps are below.
Here is also a list of my favorite sites to purchase fonts from
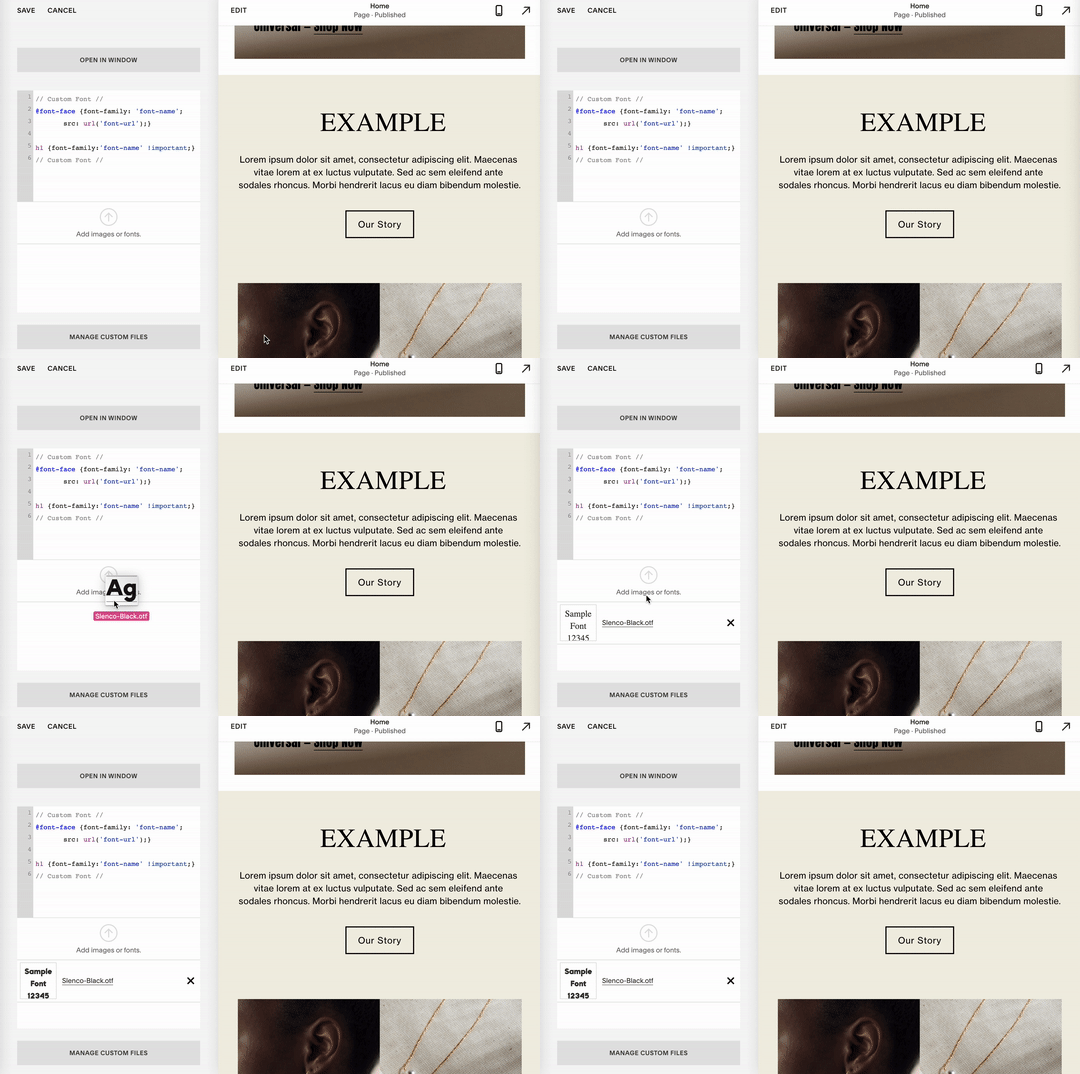
Step 1: Add the font file
To add your font file, go to the Head to Design > Custom CSS. Scroll to the bottom and click Manage Custom Files and upload your font file.
Step 2: Add the CSS code
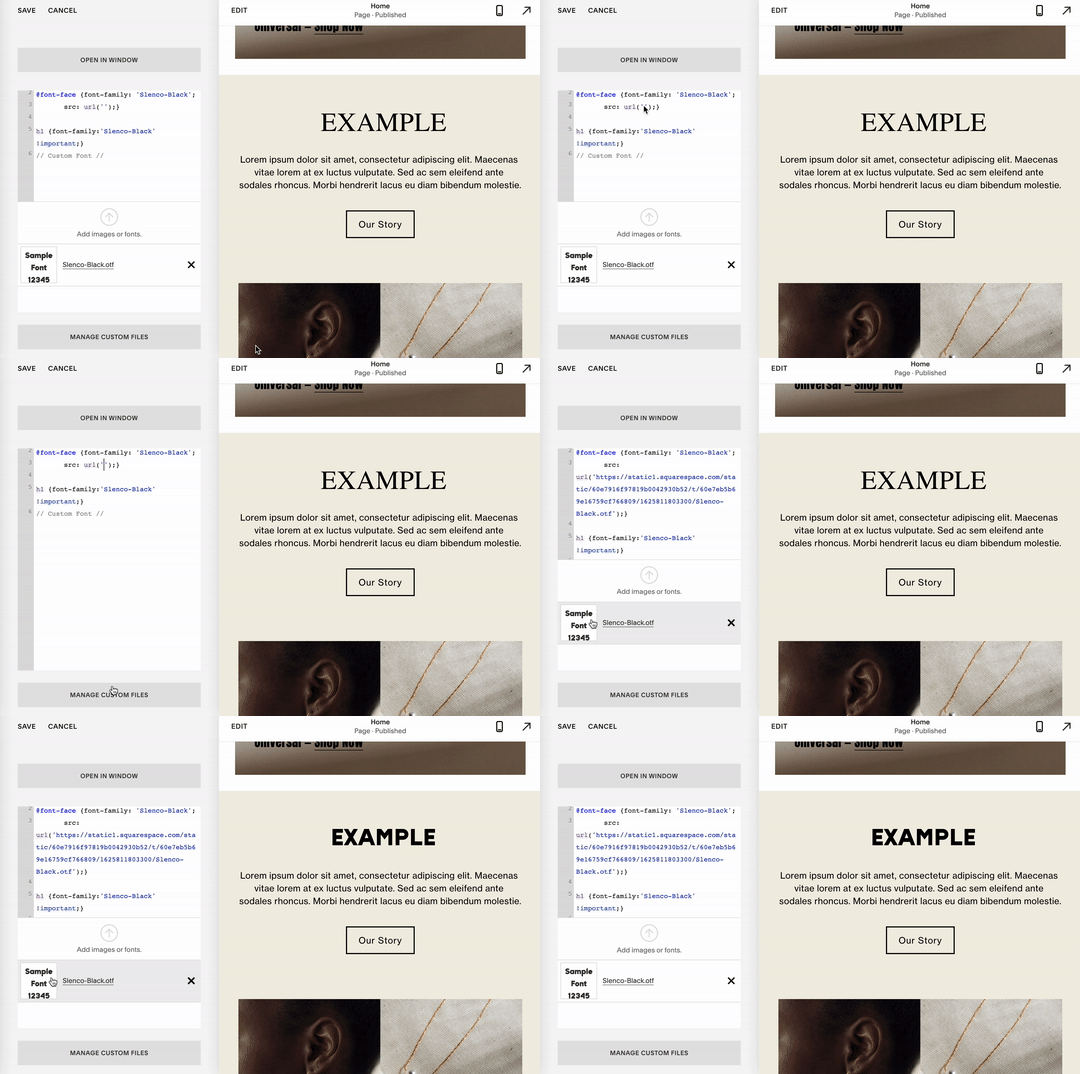
Copy and paste the code into the CSS Editor box. Replace font-name with the file name as it appears on the file.
Then update the font-url with the generated Squarespace URL by selecting the file.
Copy and paste this code to Custom CSS
// Custom Font //
@font-face {font-family: 'font-name';
       src: url('font-url');}

h1 {font-family:'font-name' !important;}
// Custom Font //
Customize The Code
Change h1 to the header you’d like to target: h1, h2, h3, h4, or P (for Body text).
You will notice the text alter as you customize the CSS Code. If it doesn’t alter, make sure you are adding the font name as it appears on the file.
Quick Tip
You can use multiple unique fonts by repeating the process per unique font file.
If you are only using one unique font, you only have to add
@font-face {font-family: 'font-name'; src: url('font-url');) once.
That’s it!
Disclaimer: Nestingzone is not affiliated or endorsed by Squarespace, we just love their platform. Nestingzone x Weihaasome is not responsible for any changes you make to your website’s code. CSS knowledge is required in order to be able to implement the above CSS suggestions.


